
How to Start a Microbrewery
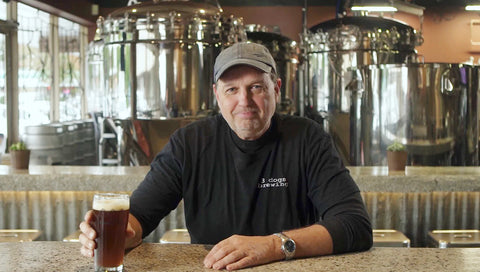
Successful microbrewery owner and master brewer Scott Keddy explains in this interview how to start a microbrewery taproom business. He started his brewery taproom in White Rock, BC, Canada (greater Vancouver area) by converting a 1600sf space in a strip mall (a former wine shop) into a really cool and successful microbrewery craft brewery taproom and incorporated the BREWHA BIAC brewing equipment system and fermenters. Brewer Scott was able to open his 520BBL/year brewpub brewery business for about USD220k/CAD290k (in 2017/2018) and a return on investment (ROI) in under 6 months!! Here's how he did it. (And there are tips along the way for breweries of every size.)
See this page for a microbrewery startup budget cost estimator calculator.
8 steps for how to open a brewery
1. Reasons to open a microbrewery and forming a brewery business plan
2. Plan microbrewery site selection
3. Microbrewery equipment overview
4. Plan microbrewery construction and brewery installation
5. How to brew beer: beer brewing steps
6. How to keg and carbonating beer
7. How to build the brand; local marketing sales and distribution
8. Link to view architectural brewing plans and budget for a brewery
1. Reasons to open a microbrewery
I'm Scott Keddy, the principal brewer and one of the owners of Three Dogs Brewing here in White Rock BC. We saw a need for a new brewery business in the market as there weren't many breweries and there was an opportunity for a new small brewery business in White Rock. We weren't looking for anything to get too massive, we weren't trying to compete with the big boys, we were looking for something that was very community oriented that was in a location to be inviting for the local community, that could come in have a beer, play some games, socialize, have it as a local community space.
2. Business plan and microbrewery site selection
So we started to plan our brewery about a year ago and that was the looking into the legislation and permits, what we would need and what it would take to open a new brewery business here in the White Rock market and looking for a good location. Going through the process we found out it was first of all doable for someone with our craft microbrewery business budget (see Scott's budget at the link on this page; this page provides a brewery startup calculator to estimate costs). We didn't want to get into it too deeply, too financially heavily with loans. We (my partner Pam and I) both love beer; I've been brewing non-professionally for quite a while with a BREWHA All in One brewing system in in my basement that I turned into a small microbrewery. When we were looking to get brewery equipment to homebrew with we didn't want to do it with buckets and carboys and just play, we wanted to make some quality beers. I looked at various systems and we settled on the BREWHA All in One 15 gallon brewing system and I reached out to Nathan the owner and he was so helpful in getting us off on the right foot. Or friends were coming by and they're tasting our beer and they were liking our recipes and saying you are a good brewer, you should be selling beer locally. Well selling beer is is a whole different story so we kind of pushed back on that but we just started to get into brew competitions with our home brew beer and we did quite well. A long story short, jumping ahead a little bit we were looking for a good lifestyle business here in White Rock and people say well you're retiring, you make beer, you are a brewer, why don't you sell beer?
So first step in September of last year we started to plan for the brewery and that was the process of incorporating our company, getting the paperwork started with the liquor board for tax and other legal matters, assessing the local market and other microbreweries and looking for a brewery location. Now when we were looking for a good brewery space we were looking for something very specific we didn't want to get into a big industrial area which is difficult for people to get to because we were looking for a local business. We knew we would need a good retail location in a strong business market area. We looked into a few in the areas, settled on this one. It suited our needs, it was a former wine store business and we're about 1600 square feet here. We went to an architect for help who drew up some preliminary plans some floor plans, gave us some occupancy loads we finally got to the point where we secured the space had the wheels in motion with the city and the Liquor Control Board (for tax), and we took possession of this space just after Christmas of last year so we started renovations in January. Come July we started brewing, a little bit behind schedule, but in reality probably real, more realistic. We opened our brewery doors in August, we're now here six or seven weeks in and the response has been overwhelming.
3. Microbrewery equipment
This is the 5BBL brewery that we went with it was the largest system that BREWHA had at the time (BREWHA added 7BBL microbrewery equipment in 2020 and 15BBL brewery equipment in 2024). It works for us perfectly because of its flexibility and portability.
4. Microbrewery construction and installation
We have a very small brew space in here, I mean our whole microbrewery business is crammed into 1,600 square feet and that includes the taproom tasting room, the bar serving area, the milling area in the back and our brewery area.

The brewing area here actually is about 500 square feet. Trying to do 30 barrels of craft beer in the 300 square feet for a typical system that many breweries use would be impossible with a fixed standard mash tun, boil kettle would take up about half the real estate we have available.
This system allows us to move the tanks into our brewing area, make beer, clean, do whatever when you need to and then move them back into a small area close together where they can ferment, and then we can move them around the brewery to fill kegs, basically it's it's always on the move.
The steps for brewing craft beer are all the same as a traditional commercial brewery business. You need to grind the grain, you mash, you lauter, you boil, you ferment. The approaches are different though in the equipment that you can use that's going to give you varying results. The BIAC allowed us from the get go in a very small footprint, a very economical size package to control all the aspects of the brew which gives you such consistent results. Everything matters when you're making craft beer, everything from the size of the the grain/grist that you're milling to the the water temperatures, the type of yeast, the temperatures you're fermenting at, the temperatures your how fast you can cool the wort, everything matters, so the more you can control each aspect of it the better results and more consistent results you're going to get. The BIAC right from the get go allowed us to control all those aspects very carefully.
Someone starting a business with the BIAC could start on a larger system, but it would help for them to have a little more experience with the smaller BIAC, but not required. Certainly it would help if someone were starting a business with a larger BIAC to come and visit us, for example do a couple brews with us, and see how we do it, what some of the techniques that we use. How we use the equipment on the big or the small is almost exactly the same, there's a few minor differences that we use to make the brewing with the bigger BIAC a little more economical in terms of time, we use an external wort chiller not needed but we do, we use a slightly larger pump then you might use at home but fundamentally the techniques and the process with the BIAC is the same for the small all the way up to the 5BBL (now 15BBL) BIAC.
Our brewery business brew / taproom, it's quite open from the taproom seating side will open right into our brew side so we're always working in here when it's open and we get a lot of comments from our guests that they really like being, they feel like they're part of the process. Things are always moving, things are always changing, things are always in motion, they really get to see the process, be part of it and and see where their beer is coming from. It's not hidden away in a room somewhere, it's right in the midst of the whole brewery taproom.
When we took the business space over it had a false ceiling in here -- a dropped t-bar drop ceiling that we wanted to get rid of; two reasons one we needed the height and we also didn't like the look of the white tile ceiling. So we tore the ceiling out, we painted everything black, we set up track lighting. To make the bars, we installed the brewery cooler, we had to build a walk-in cooler behind us here to keep our beer cold. We decided that we were going to serve right from our cooler so we designed it so we didn't need long beer lines. As far as ventilation we didn't need any modifications to the ventilation in here and we didn't set in any floor drains. Because the BIAC system is is very portable and manageable, we don't have the same problems that a larger brewery has where they're dumping stuff onto the floor and making a lot of use of floor drains. Any little spills that we make we just pick it up with a shop vac and carry on.
In terms of other brewery installation modifications we had to get some plumbing modifications done to help increase the water supply to the brew side so it's an 1.5" system and it drops down to 3/4" as it gets here. We run three-quarter inch through a backflow device into a filtration system and we use a three cartridge filtration system to remove sediment, chlorines, and and metals. We were fortunate when we came in here we had a lot of power already. We have two 225 amp panels which more than supplied our needs and they are three-phase panels, the nice thing about the BIAC system it's adaptable to single-phase or three-phase, we want the three-phase simply because it's a little more flexible in terms of power requirement needs, we use a little less power than we would with a single-phase but certainly doable with a single-phase panel. As far as any other renovations in here, we put in the bathroom we needed to... one of the requirements of the city was that we need to have handicap accessible washrooms so we needed to get another added. Other than that as far as the tap room bar furnishings and everything else we built a lot of the sinks and the stainless steel you'll see behind me here in our brew area we got used; we picked it up used at restaurant business auctions, we just watched the local auctions and saved some money that way.
5. Beer Brewing Steps
A typical brew day for us starts with two things: first, we start filling a new vessel. Because our flow is is slow through the filters because we're treating it through three stages, it probably takes us several hours to fill up a tank so we need to get that started the day before. We start bringing up temperature to our strike or initial strike temperature.

At the same time while that's filling, we're off on in the back milling the grain. We have a small mill, we mill everything right here on site and we just mill it right back into grain bags and we'll bring it out here we'll fill up the mash colander at about half of the the grain we'll pull the lid off of the fermenter here and drop the grain and add the rest of the grain and then start the mashing process.

We will mash for whatever the recipe calls for usually somewhere in the neighborhood of an hour or an hour and a half watching our gravities all the time.
Once we've hit our time or the gravity we're looking for will start to pull the grain out. We use the overhead gantry here and we just simply raise the Mash Colander right out of the grain while watching our levels, our water level so we're not exposing any elements (you need to keep the heaters covered at all times), and start to sparge. We use a separate hot liquor tank to supply the water for the sparge.

We'll sparge to the level or the gravity of what the recipe calls for and then remove the grain entirely. We've made arrangements to help a local farmer, all our spent grains go to feed his cows. We just simply put the spent grain into several bins and send him a text message and he comes by picks it up and feeds it to his cows. We're kind of happy that we're not just throwing that into a landfill.
Ceiling height for the BIAC system is something to consider only because we need to raise the Mash Colander clear of the vessel. We have a very low ceiling right in here, I think our ceiling height here is just shy of 11 feet. Now when we were considering the BIAC system for this space we went back and forth with the specs to make sure that we could fit it in. This ceiling height just works we were we were able to source a gantry and a new low-profile headroom crane that worked, certainly a higher ceiling helps and makes it a little easier but it certainly can be done in a small/low ceiling height if you plan for it.

After we've removed the grain and emptied the grain we've we get the the Mash Colander out of the brewery area then we start to bring it up to boil with our controller. Boiling obviously creates steam. Steam is not a problem for us because... we didn't actually make any modifications to the ventilation in here. We don't have a big steam collection vent, what we do is we have a 1500 cubic foot per minute blower that we use the actual top of the vessel and we put on an elbow with a flexible hose goes, off to a blower that we reach... we push the air back into the air conditioning system and use the dehumidification properties of the air conditioning system to remove most of the steam. Our ambient humidity level in here is probably running around 45 to 50 percent so on brew day a lot of that steam just goes into the atmosphere and will bring up the ambient humidity in here to about 70 percent. The rest is taken care of by the air conditioner so we didn't have to make any major ventilation modifications for the brewing, which was a good plan that helped save just a fabulous amount of time and effort and money not to mention mechanical costs and inspections and everything else.
Hop additions-- obviously we plan hop additions depending on the recipe at different stages in the brew process. We use a hop spider—hop spider is just a name for a big basket that sits in the side of the brew vessel that we just toss our hops in. At the end of the end of the boil while it's cooling we've got all our hops, (that hop spider is just withdrawn) we let it drain very slowly and then remove it right from the vessel, all the hop debris is is contained in that hop spider and we just dispose of it that way. It's not necessary some breweries will just throw the hops directly into the boil and let it let it settle out and remove it with the trub.
We are a craft brewery, we don't filter our beer, we don't do anything special to our beer after the boil or before we keg it or serve it, and we find that that gives us clear beer. When we were using the very small BIAC system at home we used to make use of the jacket on the outside of the vessel. When we got to the larger 5BBL system we still used the the external jacket for chilling for cooling after the boil but we also, for the last five minutes of the boil, we run an external wort chiller. We run the boiling wort through the chiller, it's already been cleaned and sanitized, but that just gives us the final sanitation. Recirculating back into the vessel to chill down from from a boil we can bring it down, this 5BBL down from a boil using the the jacket and the wort chiller in about 45 minutes and that's pretty quick.
After the boil what we do is, and it's chilled, we'll remove a little of the hop and the hop debris from the from the boil, we'll oxygenate it using pure oxygen for -- depending on the volume -- probably about 4 to 5 minutes, and pitch our yeast. It's pretty straightforward, there's no real magic to it, in fact we were trying to get really fancy for a bit and use oxygenating stones and everything but what we found actually works really well is we just hook our oxygen up (after chilling complete) to the intake of the wort chiller and we use that initial oxygen to clear the wort chiller and everything back into the vessel so we're using the the oxygen to do some of the work of cleaning out that chiller. Then we just close our valves in the right order and we pitch our yeast and put our lid on and we're ready to ferment.
For temperature control of our fermentation in our brewery we've gone and used the new Lindr brewery chiller supplied by BREWHA to control our temperatures all the way through. We use it for every step/every stage of the brewing process right from controlling our fermentation temperatures to cold crashing and we can control that temperature within a degree all the way through the ferment process. So whether we want to raise the ferment temperature or drop it or that will control the ferment temp and through primary secondary and right up until we want a cold crash the beer. And when we want to cold crash we just drop the temperature on the controller and that little unit goes to work and we can drop these big vessels with this small wort chiller down into the low 40s high 30s. The main reason we didn't go with the glycol system set up like many breweries, is it required one very big unit, permanent piping and given the nature of of our system here and our footprint and how we how we use the equipment, a glycol system is very expensive, problematic with permitting, the city would require their services and would have wanted it mechanically engineered and signed off, permanent piping and installation... This little chiller for our size is very economical, there's no waste going down the drain, there's no contamination, there's no glycol spills, there's no glycol chillers that we have to be moving around, there's no glycol lines we have to hook up, it's tap water that controls our temperature and does it as accurately and as efficiently as a glycol system breweries use. It serves our needs perfectly.
As far as fermentation time for the beer we make, primary fermentation typically seems to take, depending on the yeast we use and the gravity of the beer and everything, primary usually is over within about four to five days. We'll watch the the gravities and watch our secondary fermentation... we usually, it's usually about 10 to 12 days of primary and secondary before we start to dry hop if the recipe calls for a dry hop, then we'll add our dry hop, through the top of the vessel. We just use cheesecloth bags, we suspend our hops into the beer with cheesecloth bags, for our dry hopping suspended with spiderwire, spiderwire is just very strong nylon filament fishing line and we just tie them off to the side of the vessel they go right up through the gasket, it's such a fine line there's no sealing issues and it just suspends into the beer.

6. Kegging and carbonating beer
For kegging we use the CO2 to push the beer down through a modified keg coupler we set up, right into the tank. We don't filter our beer, we cold crush our beer until it's to the clarity, as clear as we can get it. Everything settles out. We'll pull that hop debris out so we've got a nice clear place to draw from and then we'll start to keg the beer. That goes into 50 litre kegs that we take into our into our cooler. We have a CO2 tank with a regulator and a small manifold we have set up that distributes to eight keg couplers and we can force carbonate our beer. We can control the volumes of CO2 and the pressure the CO2 to carbonate those kegs. The beer kegs take about three days to bring up to the right carbonation level depending on the depending on the style of beer, and then it's ready to serve. Typically though we'll have four or five kegs ahead of the one we're serving carbonating so we have just a small little program in the back of our brewery—you have uncarbonated ones, ones that are being carbonated, ones that are ready to serve and ones that are being served. So we just manage that whole thing through the back. We don't use bright tanks like some breweries, a brewery our size doesn't need a bright tank, it ties up too much real estate. A bright tank of any size is going to limit our ability to serve a variety of beers. We run six of these five barrel fermenters and we have right now six or seven or more beers that we can produce and have on tap for our guests.
We clean our own beer kegs right here, I have a little keg cleaning system that we've set up. We pull the spears every time, we inspect the kegs every time. So we disassemble the keg we'll take the spear out and examine inside with a flashlight. We'll rinse it out with cold water then we use our hot liquor tank when we're cleaning kegs to push hot water through it through a CIP ball and then we move onto another CIP ball that sanitizes it and then we rinse it again with hot water and then inspect it make sure it's clean and put it back together.
For serving our beers in our brewery we force carbonate the kegs and we serve directly from the kegs right through that the cooler wall into our taproom serving area. So our serving area backs onto the cooler, we've just sized the length of our lines to match the style of beer just to balance the keg out and and the pressure that different styles of beers are served at, so an ale that might be served at 11 psi will have make sure that the line for that is probably about 10 to 12 feet long. Because we're a small lifestyle brewery business our distribution model is over the counter. We sell beer in our White Rock market over the counter. We have a 46 seat tasting room that is open five days a week. Most of our beer is sold in pints, flights and growlers. We have two sizes of growlers we have a one liter and a 2-liter growler, twelve ounce glasses, 16 ounce classes and flights. Everything we sell is over the counter.
7. Marketing the brand and distribution
Our plan when we set up this new craft brewery business was not to take on too much. We didn't want to start having to distribute to liquor stores like other breweries, to other restaurants, to sell kegs or hire another brewer. Certainly we've had a lot of inquiries from people, would we be able to sell kegs, but given the size and the response that we've had, we can produce at a comfortable brewing level, and what I mean by that is number of brews that we do a week. We end up doing about two brews a week in our brewery business, with that we're able to keep pace with our sales in the tasting room and meet market demand. Were we to go to brewing and trying to sell kegs into restaurant businesses, trying to can, and to plan to have outside people come in and help do our canning for us to be able to distribute, our brewing investment in terms of time would go through the roof, for not a lot more return. Our sales now in our craft brewery business are in the 300 to 350 dollars per square foot range (in 2018), which in a retail environment market is pretty good. It just shows to me that there's good demand for this type of new business in communities.
Note: Scott, along with several other BREWHA brewery owners in this article provided these key criteria to ensure success in your brewery startup.
Brewery architectural drawings / floor plans for 3 Dogs Brewery
2025 Budget for opening a microbrewery (USD)
2025 Budget for opening a microbrewery (CAD)
Benefits of the BIAC complete brewery system
BIAC complete microbrewery system product page
Expand your brewery capacity with these BIAC microbrewery fermentors
How to start a brewery (in a desert)