
How to Save Money by Propagating Your Own Yeast with a Yeast Starter
This article was submitted by brewers Rick and Paul from Victoria, BC. They are two very accomplished home brewers who have multiple awards under their belt. In this article, they discuss their method of propagating yeast (building up the yeast count through a yeast starter) which doesn't take much time or effort and enables a brewer to save quite a bit of money on yeast.
The point of this article is not to debate the superiority of liquid over dry yeast; both forms have their merits. Rather, our purpose is to offer what we hope is a helpful suggestion when it comes to building and harvesting yeast starters.
Harvesting yeast post fermentation always seemed inefficient and potentially problematic. At that point in the process, and depending on the beer that was fermented, the yeast may not be in its best condition. High gravity wort may especially affect yeast health. What’s more, yeast that is being harvested at the end of a fermentation cycle needs to be “washed” or separated from the trub or undesirable remnants of that brew, which are made up of hop particulates and protein solids.
Instead, building and dividing a yeast starter prior to fermentation results in a much healthier and cleaner sample. We have used a yeast to eight generations, and have heard of others going far longer than that with no ill effects or changes in yeast character.
The process we use is outlined below, but first we’ve provided a list of helpful tools and ingredients.
- Kitchen scale
- Erlenmeyer flask (borosilicate glass)
- Dry malt extract
- Yeast nutrient
- Canning jars and lids
- Fermcap S foam control
 Step 1:
Clean and sanitize your Erlenmeyer flask. We have a 5-litre flask because we are usually making a 3 to 3.5 litre starter. Choose one that meets your particular needs.
Step 2:
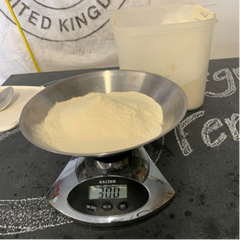
Weigh out your dry malt extract (DME). Typically, 100 grams per litre will give you a 1.035-1.040 specific gravity which is perfect for growing yeast.
Step 3:
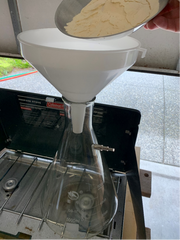 Pour the DME into the Erlenmeyer flask before you fill it with water. Trust us, you’ll want a dry flask and funnel for adding your DME; it’s very sticky, and any moisture around the neck of the flask will cause it to clump. Now fill your flask to the desired level with warm water which will rinse off any DME in the funnel. Cover the flask opening with clean aluminum foil.
Step 4:
Once you’ve added warm water to the DME, give it a good swirl to mix it up. We plan to put our flask on a stir plate once cooled, so we make sure our stir bar is sanitized and inside the flask but held up out of the way by some magnets so it’s being exposed to the steam of the boil, but not being damaged in the boiling wort (not sure if it would be but we don't take chances).
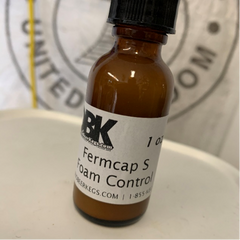 At this point, do yourself a favour and put a drop or two of Fermcap S Foam Control into your wort. This will keep your boiling wort inside the flask instead of all over your stovetop. We don’t have a gas range in the kitchen, so we use a little propane camp stove and it works great. Don’t make the mistake of putting a glass flask directly onto an electric element! If you don’t have an Erlenmeyer flask, you can boil the wort in a pot and then transfer the wort to a cleaned and sanitized gallon jug. If you’re using a glass jug instead of a borosilicate glass flask, be aware that it may not tolerate extreme temperatures.
Step 5:
Bring the wort to a roiling boil for a few minutes. The foil should be loose enough to let some steam escape.
Step 6:
Remove from the heat and begin to chill the wort as quickly as possible. We usually let our stir bar slip into the wort at this point to let the heat of the wort fully sanitize it. Have the yeast you intend to inoculate the wort with ready for pitching. We often build a 3-litre starter and then divide it into three or four separate jars which are either used individually on brew days or get built into larger starters again. It’s important to mark the jars clearly with the strain and date, because you will forget when it was set aside. We leave the lid slightly loose to let gas escape, but BREWHA has a Yeast Harvester with pressure relief on the Accessories page which would be perfect for this as you could seal it and know it won't explode.
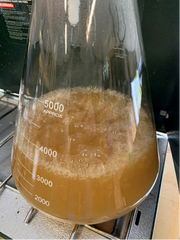
The image to the right shows a good, healthy yeast starter after 24 hours on a stir plate; that milky white appearance means billions of yeast cells ready to ferment your beer!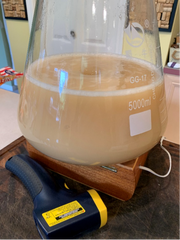
From this starter, We poured off 500 ml into another sterilized sealer jar and still had a big starter to ferment 15 gallons of an IPA with a starting gravity of 1.064. This Wyeast 1217 is one of their Private Collection yeasts that is a personal favourite of our, but it’s only sporadically available. By overbuilding starters and harvesting yeast before brewing, we’ve kept this yeast going for about two years and used it about 7 or 8 times. For the cost of a little DME and some time, we’ve always got a starter that meets our needs.
Link to the beer brewing equipment system that Paul and Rick use
6 comments
Hi Martin, there are a number of online tools for calculating yeast pitch rate and starter for propagation, here is one for example:https://www.brewersfriend.com/yeast-pitch-rate-and-starter-calculator/
Great article. What is the best way to grow own starter for 5BBL BREWHA? Still a bit lost in this.
Speaking of 100-150 billion cells, are we talking about 100-150 x10e9 as per US convention or x10e12 as per British/EU one?
How many of BREWHA breweries are using microscope to count and how many are using automatic counting system?
Cheers.
Hi Chris, you want minimum 100 billion cells per 5gal/20L of wort (producing beer at up to 8% ABV), and 150 billion is recommended. The concentration of your slurry will vary but generally is about 1B/mL. It is best to use a yeast pitch rate calculator for determining starter volumes. There are many online. One good one that I have enjoyed using is by Brewer’s Friend.
Thanks for the feed back. I also have a large biac and was curious what size starter you use with the re-used yeast that you put aside?
Hi Chris, dme seems to be a pretty good media for yeast starter for beer but if you prefer another and it works well for you, then that is great.