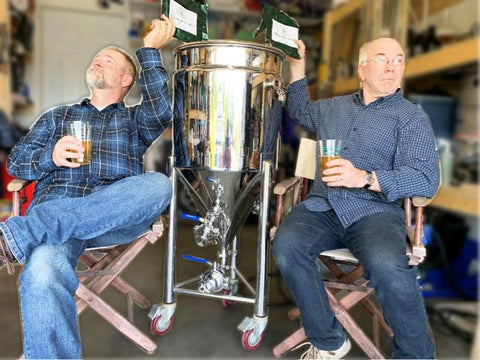
In this article, accomplished brewers Rick and Paul from Victoria, BC discuss their method for maximizing hop flavor and aroma.

When we began brewing in 1998, the craft beer industry seemed to be just entering an arms race of a sort: who could brew an IPA with the most bittering units. Brewers were producing truly bitter beers and printing staggering IBU claims on their cans and bottles; however, much of this related more to marketing than actual taste.
In recent years, this love of hops hasn’t gone away, but rather evolved. IPAs remain remarkably popular, but the focus seems to have shifted away from bitterness. NEIPAs (New England IPA), juice bombs, hazy IPAs, SMaSH (Single Malt and Single Hop) beers – call them what you want, these “styles” have all evolved to feature hop flavour and aroma over bitterness. Now, maybe it’s because we’re a couple of grumpy old men who are resistant to change, but we’re still big fans of clear beer; so, our goal is to get as much of that juicy flavour and aroma into a product that is still relatively clear. Here are some of the techniques we’ve experimented with that have worked well for us. (Disclaimer – The adage, “Fools rush in where angels fear to tread” seems somewhat appropriate here, as neither of us are chemists. The following information and suggestions have been gleaned from reading and experience.[i])
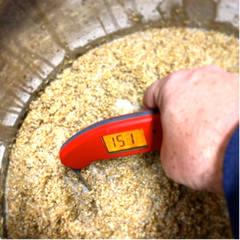
First, it seems prudent to relate some of our thoughts on yeasts and malts which, though not directly related to hops, often serve to accentuate or highlight hop perception.  Typically, when we brew to feature hop flavour and aroma, we mash at around 65-66°C (149-151°F) for high fermentability; we choose a neutral yeast that’s quite attenuative; we pitch a big starter; and we ferment on the cool end of the yeast’s range. Our goal is to keep yeast flavours from competing with the hops and to brew a beer that finishes around 1.008 to accentuate the hops through dryness. We’ve found that it’s really easy for stewed malts (crystal/caramel malts) to overwhelm the palate and dominate bright hop flavours.
At the same time however, if a juicy NEIPA is what’s in sight, then some sweetness, through higher finishing gravities and malt selection, can compliment the fruity profile that brewers want in a hazy IPA. Yeast can also help here. The high temperatures at which some Kveik yeasts are used develop some wonderful fruit flavours. Be aware, however, that with a Kveik yeast and lots of hops, the goal should be a hazy IPA, because it likely won’t clear even with finings.

In turning to the hop end of the equation, the first, and probably most obvious, suggestion is to use more hops! If the goal is big hop flavour and aroma, it takes big hop additions – and hops are expensive, so prepare for a beer that costs more to produce. However, just dumping more hops in without thinking about how they’re being used isn’t particularly effective.
BITTERING ADDITIONS:
As we mentioned earlier, big bittering additions aren’t going to get us to our flavour and aroma goal. The essential oils in hops are extremely volatile, and a 60 to 90-minute boil will drive off just about everything that we want. Depending on what we’re brewing, for our bittering addition we usually select a hop with a high alpha acid content so that it doesn’t take much to achieve the bitterness we desire. Recently our preference for general bittering duties has been Apollo or Summit. Both varieties feature alpha acid levels in the mid-teens, pleasant flavour profiles, and excellent storage properties. We usually aim for about 35-40 IBUs to prevent bitterness from being overwhelming. It’s important to recognize that large late additions do still contribute bitterness. Studies have demonstrated that isomerization still occurs at temperatures well below boiling; however, it is much less efficient. In a recent 10-gallon Falconer’s Flight (10.9% A.A) SMaSH, we had a pound of hops we intended to use, and we bittered with 2 ounces which gave us about 35-40 IBUs.
INTERMEDIATE ADDITIONS:
This addition, added with anywhere from 30-10 minutes remaining in the boil, is frequently referred to as a “flavour” addition in recipes; fortunately, many brewers are coming to realize that if they really want flavour, it’s best to skip this addition altogether. It’s counterproductive to add hops for flavour only to have half of the flavour compounds boil off. Studies have shown that an alcohol like linalool, which contributes fruity and floral elements, can be reduced by as much as 50% in as little as 5 minutes of boil time. We’ve taken this information pretty seriously, and seldom waste our hops on the so-called “flavour addition.”
POST-BOIL ADDITIONS:
Since flavour compounds are so volatile, it makes sense to find temperatures that will extract those compounds and make them soluble, while not driving them off. Whirlpool and steep additions have become the standard means of achieving that. Flavour tests have confirmed that steep additions account for far and away the most flavour; they also contribute a significant amount of aroma. Dry hopping, on the other hand, contributes almost exclusively to aroma, at least positively; vegetal and grassy flavours can result from lengthy dry hopping.
Two main concerns remain then for whirlpool or steep additions: temperature and time. Sit down and talk about this with ten brewers, and you’re likely to get ten different opinions. We’ve read brewers advocating everything from 96°C down to 60°C (205°F to 140°F). To date, researchers have identified aroma compounds numbering in the mid-400s. Some of these are incredibly delicate and disappear very quickly, while others need heat and time to become soluble in wort. Add to this equation the growing variety of hops, and it becomes clear that a lot of experimentation is required – lucky for us!
In our experience, we’ve had the best results by reducing our temperature to 80°C - 77°C (175°F - 170°F). Typically, we fill the BIAC chilling jacket once and then shut the water off. Depending on ground water temperature, one jacket full gets us pretty close to our steep temperature. This will obviously require some individual experimentation, just be aware that the high-end temperatures come off really quickly, and it’s easy to overshoot and drop too low. It’s also worth mentioning that at this stage, oxygen pick-up can lead to off flavours. Thiols from the hops combined with oxygen can lead to a perceptible green onion profile, so be careful trying to stir temperature out. Once we hit our target temperature, we add our steep hops. This is by far our largest addition and we let these soak for 50-60 minutes with occasional gentle stirring. The length of the steep is just as debated a topic as temperature. Longer steeps may result in more flavour, but additions at different temperatures may result in more complex flavour. When the time elapses, we continue to chill as usual. Most of the hop material settles out and gets dumped with the trub before aerating. In that same Falconer’s Flight SMaSH mentioned earlier, we steeped 8 ounces starting at 175°F for 50 minutes.
DRY HOP ADDITIONS:
At this stage, take any possible steps to mitigate oxygen exposure. Oxygen is definitely the enemy once the bulk of fermentation has taken place. One of the ways we limit exposure is through a single dry hop addition. As well, we try to time our addition to serve several functions. We dry hop at the same time we perform our diacetyl rest. With a few gravity points left, we begin to raise the temperature incrementally. By adding our dry hop at the beginning of this process, we also help to eliminate the risk of “hop creep” caused by enzymes in the hops converting normally unfermentable sugars to fermentable ones. Because fermentation is still happening, the production and presence of CO2 helps prevent oxidation. Some brewers are experimenting with adding hops much earlier in fermentation to benefit from “biotransformation”; however, there are far more essential oils present from the whirlpool or steep hops than from dry hop additions, and biotransformation will be taking place regardless of when dry hops are added.
 Again, when it comes to the length of the dry hop, opinions are almost as numerous as brewers. Evidence shows that most aroma compounds are extracted in the first 24 hours, but few brewers opt for a dry hop period that short. We typically allow 3-4 days of contact and have had great success with that. Long dry hop periods can result in unpleasant vegetal and grassy flavours.
When it comes to dry hops, there is a point of diminishing returns; more doesn’t really give you more. An ounce per gallon is a reasonable upper limit. Beyond that, and you’re just spending money where it doesn’t do much good.
FINAL RECOMMENDATIONS:
It pays to do a little work and find a trusted source for fresh, well-packaged hops. Once you’ve found them, treat them carefully. Keep them cold, and if you have the equipment to vacuum seal them after opening, do so.
Buy the pellets! They’ve been proven to impart flavour and aroma more quickly than cones, and they absorb less of your precious beer. Pellets also take up much less storage room in the freezer.
Just as it pays to be picky about the source of your hops, be picky about the variety of hops you choose. Find the varieties with the flavour profiles you want. We’ve been brewing a lot of SMaSH beers in the last two years to get a good sense of what we can expect from hop varieties – that and we just love a good SMaSH! Do some research about the hops you’re choosing and have a look for the spider graphs hop researchers and growers are publishing. They can help point you in useful directions.
Finally, when it comes to highly hopped beers, time is your enemy. As if you needed an excuse, consume your hoppy beers as soon as possible. Flavour stability is still not particularly well understood, but there is currently a lot of money and research being poured into this problem, so stay tuned!
Link to the beer brewing equipment system that Paul and Rick use
[i] Two highly recommended works for understanding the science of hops are, Hieronymus, Stan. For the Love of Hops: The Practical Guide to Aroma, Bitterness and the Culture of Hops. Boulder, Colorado, Brewers Publications, 2012; and Janish, Scott. The New IPA: Scientific Guide to Hop Aroma and Flavor. Scott Janish.com, 2019.

2 comments
Hi Jason — in time, pelletized hops will generally settle to the bottom of the fermenter where they can be removed out the bottom/dump port. If you are using a highly flocculant strain of yeast (that readily settles out to the bottom) you may want to remove the settled yeast 4-5 days into fermentation otherwise it can form a fairly hard yeast cake that can bridge at the bottom and be hard to remove. If using whole leaf hops, it is best to use one of our Hop Baskets to contain them so they won’t clog the lines.
Great article! Thank you for sharing your expertise! It sounds like you are hopping directly rather than via a hop spider. I was doing that in my Large BIAC, but I found it hard to close transfer because it clogged frequently. Any thoughts? Thanks again!