In this video we demonstrate why the BREWHA BIAC is the simplest way to make the best beer. We show in 12 steps how to make fantastic beer using the BREWHA BIAC beer brewing system. We will be making 118L/31USG/1BBL of beer, however, the recipe can be easily scaled up or down to any of the seven sizes that we sell using a program such as BrewFather. The BREWHA BIAC is the simplest way to brew the best beer. It is simplest to set up, it is simplest to operate, and it is simplest to clean, all the while taking up the smallest footprint of any commercial system, and using the least amount of water, while still providing full control over the brewing process so that you can make the best tasting beer, exactly how you want it.
Chapters:
00:29 BREWHA BIAC Introduction
01:24 Brewing an Amber Ale
02:20 Step 1 Heating Water
05:25 Step 2 Mashing
10:32 Step 3 Vorlauf
11:04 Step 4 Lautering and Heatup
13:06 Step 5 Boiling
15:58 Step 6 Cooling
19:27 Step 7 Filtering and Resting Wort, Pitching Yeast
20:56 Step 8 Rinsing out the Mash Colander and Pump Assembly
21:15 Step 9 Fermentation
22:48 Step 10 Conditioning and Carbonation
24:44 Step 11 Racking/Transferring to Bottles or Kegs
25:10 Step 12 Cleaning the Fermenter for the Next Brew
Note: This video follows the brewing section (starting pg 45) in the BREWHA beer brewing system manual
Assembly video for the BREWHA BIAC complete brewing system
Benefits of the BIAC complete microbrewery system
BIAC complete brewery system product page
Transcript:
Hi, and welcome to another BREWHA video.
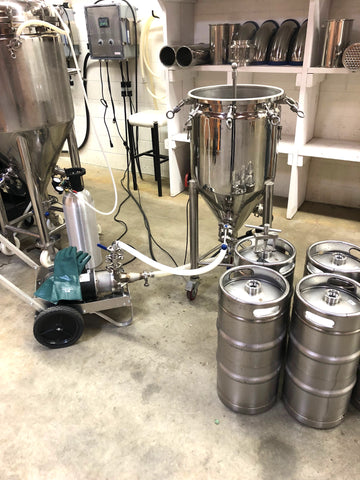
In this video we are going to be demonstrating how to make fantastic beer using the BREWHA BIAC brewing system. We will be making 118L/31USG/1BBL of beer, however, the recipe can be easily scaled up or down to any of the sizes that we sell using a program such as BrewFather.
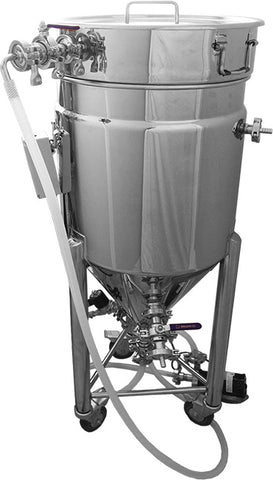
The BREWHA BIAC is the simplest way to brew the best beer. It is simplest to set up, it is simplest to operate, and it is simplest to clean, all the while taking up the smallest footprint of any commercial system, and using the least amount of water, while still providing full control over the brewing process so that you can make the best tasting beer, exactly how you want it. Oh, and it is the only brewing system in the world that uses heat to sanitize, rather than toxic cleaning chemicals.
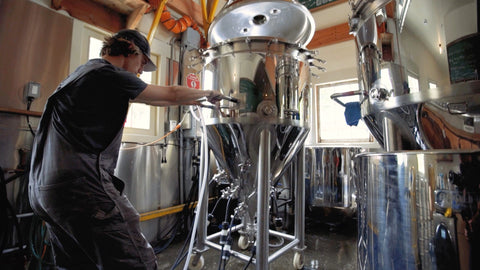
All of this has been achieved by reducing the brewhouse (what in a traditional brewery is a large platform with multiple fixed vessels and lots of piping and pumps) to just one vessel (the Mash Colander). One Mash Colander can be used in as many different BREWHA BIAC conical fermentors as a customer wants to meet the production needs of their brewery, be it 1, 2, 4, 6 or 10…. You name it.
Well let’s get into the brew! Additional questions you might have about the system will likely come clear as we work through the brew.
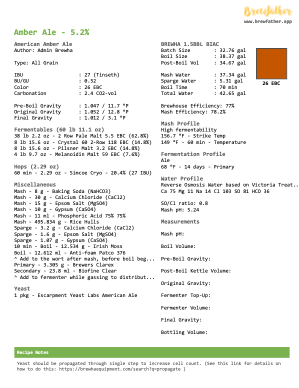
Today we will be brewing an Amber Ale -- the all-grain recipe and brew sheet showing key numbers we will be following can be found, along with several other recipes on the BREWHA website (we are using metric units today but in Brewfather beer recipe program, units can be changed however one prefers) and for easy reference, we will be following the general structure for brewing that is laid out in the brewing section of the BREWHA manual. To search for either, just enter the search word ‘amber ale recipe’ or ‘BREWHA manual’ on the BREWHA website.
After brewing a few times, making your own recipes is not that difficult. Brewing software programs such as programs such as Brewfather and Beersmith can help you calculate exactly what is needed, as well as help build recipes for given styles of beer. BREWHA BIAC equipment and mash profiles for use can be downloaded, find them by searching for ‘profile’ on the BREWHA website.
How to Brew Beer in the BREWHA BIAC
1. Heating Water: 30–60 minutes
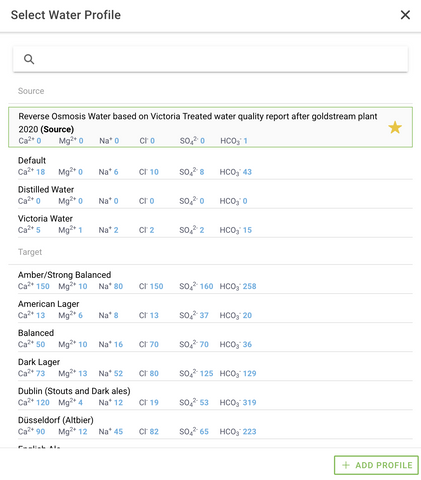
Water for soaking the grain (called ‘strike water’ or ‘mash water’) is added to the fermenter. Tap water can be used if it is good quality; as a general rule if tap water tastes good, it can be used for brewing, however, if it contains a lot of minerals, metals or chlorine (anything that might contribute off-flavor), Reverse Osmosis (RO) water should be used. (Softened water should not be used, as it often contributes too much sodium. Some minerals, especially calcium, are necessary, so RO water needs to have brewing minerals/salts added (CaCl2, Epsom/MgSO4, Chalk/CaCO3, and Gypsum/CaSO4 are the main ones, baking soda/NaHCO3 and non-iodinized table salt/NaCl are also sometimes used). Brewing software such as Brewfather can calculate these additions. Do not heat RO or distilled water without first adding minerals as the water might attack the stainless steel heaters. Technical note on water chemistry: For beginner brewers, as a general rule, if tap water tastes good, it can be used for brewing. More advanced brewers will want to learn more about water chemistry, as it can have a significant impact on the beer. Local municipalities normally make their water analysis reports available. Data from these can be entered into brewing software such as Brewfather and a local water profile created. From this, the program can make suggestions for brewing salt additions based on a style of beer and/or target water profile. This article discusses more about water chemistry for brewing beer.
Water volume (‘strike volume’) can be calculated based on the full boil volume. While each recipe will differ, this volume is approximately 1.25–1.75 times the final amount of beer you are making, so for a 118L/1BBL batch of beer, the initial volume will be approx 148–200L/40–54USG (grain absorbs approximately it’s own weight in water, about 10% of final volume is boiled off, and 5–10% is absorbed by hops and yeast so if you want 118L/31USG of beer and start with 20kg/44lbs of grain, you need to start with approx 160L/43USG of water).
If one wants to rinse (called ‘sparging’) the grain as the sugar water (‘wort’) drains from the Mash Colander at the end of the mash period, a portion of the total water can be withheld and added as rinse or ‘sparge’ water as the Colander is being lifted out of the fermenter. While this step is not absolutely necessary, it can increase the recovery of sugar from the grain by a small amount. As a general guideline, the sparge volume is about 10–20% of the full boil volume (e.g., for a 118L/31USG batch, 15-20L/4-5USG could be withheld to sparge with).
The water is heated with the electric immersion water heaters to approximately 5–8°C/10–15°F above the mashing temperature. This is called the ‘strike temperature’ (normally around 73°C/163°F for ales) and is higher than the mash temperature because as grain is added, it will cool the water to a typical mash temperature of around 65°C/150°F (a few degrees cooler will make a ‘drier’ beer and a few degrees warmer will make a ‘sweeter’ beer).
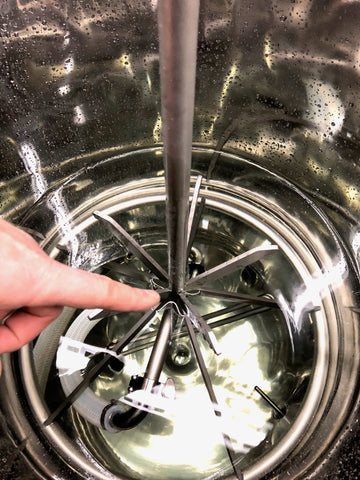
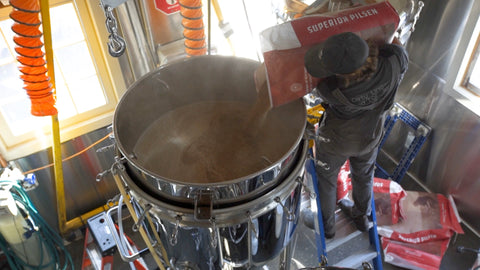
2. Mashing: 60–90 minutes
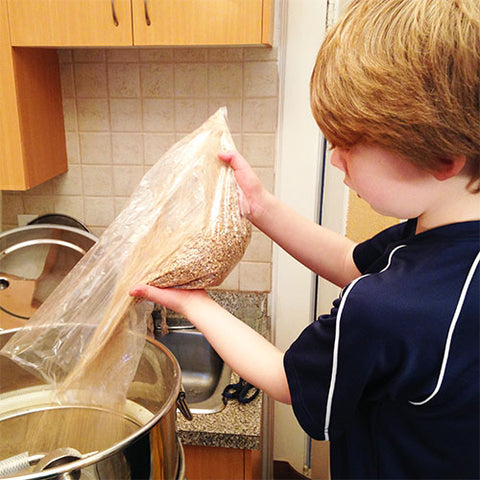
Once the water is at your strike temperature, the Mash Colander is lowered (if not already in place) into the water in the fermenter. The temperature on the controller is then adjusted to your mash temperature and crushed grain is added, using the following steps:
-
Have a proper sized crush — a consistent crush of 1–1.2mm/0.04-0.048” gives great grain bed fluidity (water can easily move through) and great mash efficiency.
-
Add the base malts in first (they don’t tend to pulverize, whereas many specialty malts are roasted/toasted longer which leads to further crystallization and when crushed, they turn to powder). Mixing in rice hulls can also improve grain bed fluidity.
-
Sprinkle the malts in, don’t dump them in—add them in such a way that they settle into the water without clumping. This reduces the need for mixing.
-
If there is floating or clumping, use the mixer only in the top 2/3 of the Colander; after this, it is not required to mix again, but a brief, gentle stir of the top 2/3 of your mash, at the 1/3 and 2/3 point of your mash period (e.g., at 20 and 40 minutes) can improve mash efficiency by ensuring water is not channelling through the grain bed. Ensure the pump is off whenever manually mixing the grain to minimize grain being drawn out of the bottom of the Colander where it could scorch on heaters or plug the pump.
-
Let the grain sit for 10–15 minutes before starting the pump (let the grain fully absorb water).
-
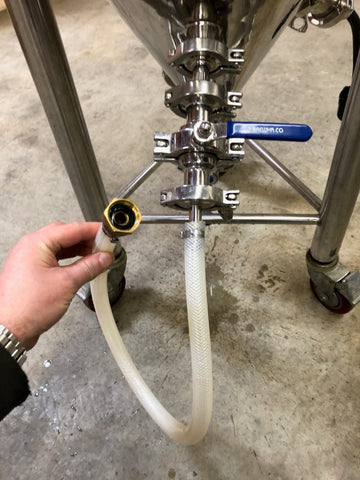
Manually remove the grain that settled to the bottom of the fermenter (e.g., out of the bottom port), and then connect the pump hose. Ensure water is unrestricted in the hose before operating pump.
-
Open the pump discharge valve slowly and follow the flow recirculation rate in Table D.
-
For added safety, turn the element(s) off any time you are adding or mixing malt.
- During the mash keep the heater output as low as possible to help prevent scorching the element (eg., 10–20%).
Confirm pH (and adjust to 5.1–5.3 if necessary—there are several ways to adjust pH, but one is to add a small amount of sodium bicarbonate/baking soda to raise the pH if it is too low, or a small amount of calcium sulfate/gypsum or acid such as lactic or phosphoric if the pH is too high; give the water time to adjust before remeasuring), and let the mashing begin! (‘Mashing’ is the process whereby proteins/enzymes in the grain are activated to process complex sugars/starches and make them accessible for yeast to digest.) For more information, search for ‘Mash’ on the website.
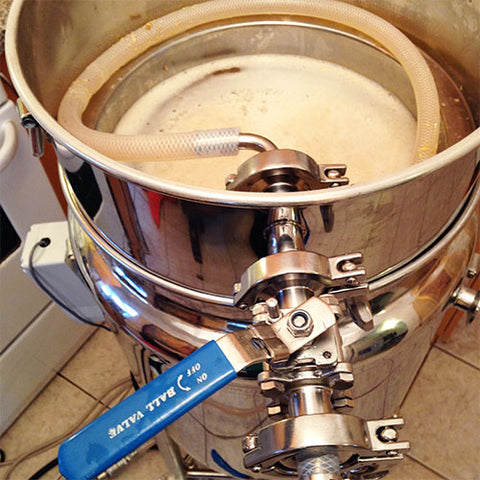
During the mash, recirculating the sugar water/ ‘wort’—with the brewery pump can yield a higher ‘mash efficiency’ (recovering more sugar from the grain), and circulation can also help regulate the temperature of the wort as it cycles out of the Mash Colander and passes the temperature sensor. If the pump is running during the mash, care needs to be taken not to circulate the water/wort too fast. If the wort level in the Mash Colander rises, the flow of wort from the pump should be slowed (see next step). If the wort level rises but does not drop when the pump flow is slowed, there might be a ‘stuck mash’ (the grain is preventing water from passing down through the grain bed), which might require stopping the pump and stirring to reduce grain compaction. (Increasing the size of the grain crush and using rice hulls are two of the best ways to avoid a stuck mash. A crush size of 1–1.2mm /0.040–0.048” is recommended.) Additional tips for preventing a stuck mash and preventing dry-firing of the heater can be found by searching for ‘stuck mash’ on the BREWHA website.
Wort recirculation will need to be throttled (by partially closing a valve downstream from the pump, either attached to the pump exit, or the Mash Colander) in order to ensure that the grain bed does not compact and that the element does not become exposed. The flow rate will depend on the ‘fluidity’ of your grain bed which is primarily a factor of your crush size—a small crush produces more ‘fines’ that plug up the bed and slow the flow rate. A general guideline for wort recirculation/flow rate (per minute) is shown in Table D.
When recirculating, measure the temperature of the grain bed and the wort entering the Colander to confirm that it is at the target temperature (a simple pen thermometer works great). If it isn’t, the temperature of the wort around the stainless electric immersion heating elements may need to be raised a few degrees above the target mash temperature. This is particularly true with the Small/5USG/20L BIAC, as the low recirculation rate allows time for the wort to cool down while in the hose.
Technical note on ‘step mashing’ (raising the mash temperature in stages): in order to raise the temperature of the mash more than a degree or two, as is required for procedures such as step mashing or if your grain bed is several degrees below your target temparture, it is necessary to raise the temperature of the recirculating water/wort significantly above the target temperature. The reason for this is that the temperature of a large amount of low-temperature water (i.e., the mash in the Colander) cannot be changed quickly by a small volume of water (the recirculating water) at only a slightly higher temperature. It is a relatively simple relationship between the volume and temperature needing to be heated, and the volume and temperature being added; the heat will average out. So, for example, to raise a 100L/25USG mash 10°C/19°F by recirculating 25L/6USG, the 25L/6USG needs to be 40°C/76°F in order to raise the total 10°C/19°F. Calculations need to be made to determine the temperature of the recirculating water and the time to raise the temperature. (Grain is a fairly efficient insulator, so heat under the Colander will not heat the grain bed up—there needs to be circulation.)
To raise the temperature of the mash quickly, a technique similar to decoction mashing (where a portion of the mash is removed, heated, and then added back in) should be used, in which the pump should be turned off and the water in the cone below the Colander raised to the calculated temperature (to a maximum of 95°C/200°F). Then the pump is started again and the heated wort is circulated up into the Colander where it will raise the temperature of the mash. If the calculations for a given temperature rise require a volume greater than the cone volume (see Table E for cone volumes), two steps are needed: first, the temperature below the cone is kept at the target temperature until the volume recirculated AND the volume in the cone equals the calculated volume; then the temperature is set to the new step temperature while recirculation (to empty out the hotter wort in the cone) continues. (A maximum temperature of 95°C/200°F is recommended, as heating any higher will likely cause foaming up the sides of the Colander—if this starts to occur, lower your maximum temperature.)
Fortunately (unless you love math) programs like Brewfather and Beersmith have a decoction calculator that gives the amount of water needing to be recirculated. In the Beersmith example shown in Table F, with a temperature rise from 55C to 65C, a strike volume of 575L (100L in the cone and 475L in the Colander) and 300lb of grain, the calculator indicates that 175L are required. To achieve this, with the pump off, heat the area below the Colander to 95°C/200°F. Then start the pump and circulate for 7.5 minutes at 10L/min, keeping the wort in the cone at 95°C. At this point, one will have put 75L of 95°C water/wort into the Colander, and there will still be 100L of 95°C water below the Colander for a total of 175L of water. Then set the ETC back to a target temperature of 65°C/150°F and continue recirculating. The temperature in the cone will gradually drop as the wort from above cools it, and the temperature in the Colander will rise. After 20–30 minutes the mash should be very close to the target temperature. (As with decoction mashing, it is important to keep the mash pH at the low end of normal—close to 5.2—in order to minimize any tannin extraction.)
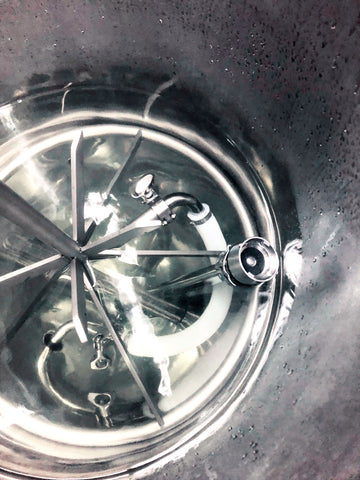
3. Vorlauf: 10–20 minutes
If water/wort wasn’t recirculated during the mash, it should be at the end of the mash period. The grain inside the Mash Colander forms a filter that captures small grain particles as wort passes down through the grain bed in a process called ‘vorlauf.’ Minimizing the amount of grain in your boil improves the beer’s flavor. Wort flow rates should be close to that listed in Table D of this section to help avoid the risk of a stuck mash and damage to the element. Wort should be recirculated until it clears up.
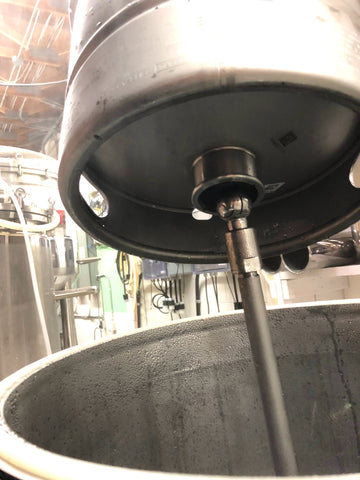
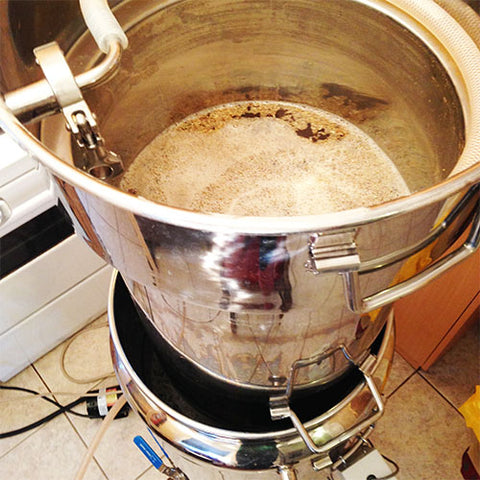
4. Lautering and Heatup: 30–60 minutes
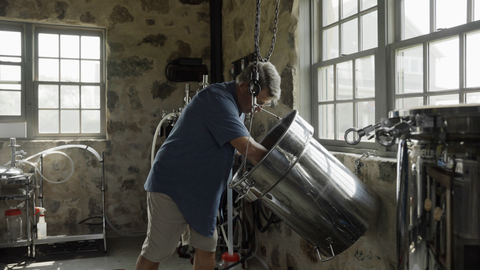
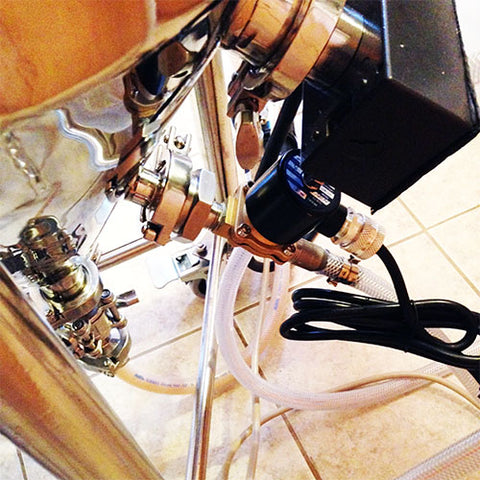
When mashing is complete, the Mash Colander is lifted out (using an overhead electric chain hoist is desirable, as it is possible to raise the Colander slowly to allow for more gradual separation of grain and wort). The wort drains from the grain (out through the false bottom of the Mash Colander) in a process called ‘lautering.’ Sparge water can be added to rinse the grain and increase boil volume. Fresh water for sparging can be added as the wort level drops, maintaining a ~2cm/1” layer of water on top of the grain bed. It is generally recommended that sparge water be 75°C/167°F to increase the ‘fluidity’ of the grain and wash out the sugar more readily, however, cooler water can be used. Sparge water can be pre-heated in a separate hot liquor tank, or, sparge water can be heated by passing it through the fermenter jacket. The Water Flow Meter (Figure 57) can be attached to the jacket and used to measure the sparge water (for more information search for ‘sparge’ on the BREHWA website). Once grain is removed from the wort, the Immersion Electric Heating Element is gradually turned up to 100% to heat the wort up to boiling. (For brewers using a Tabletop Power Controller, during the boil the contactor whip can be unplugged from the ETC (Electronic/Digital Temperature Controller) and plugged directly into a live receptacle such as a wall socket and the power to the element controlled completely by the power output knob on the Tabletop Controller. For brewers using 120V power, to protect the ETC from overheating, plug the element directly into a wall socket during the boil.) Emptying your jacket before boiling is recommended to reduce heat loss to the air.
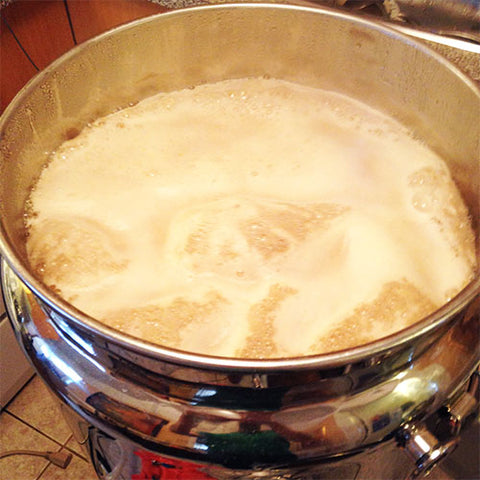
5. Boiling: 60–90 minutes
Once a rolling boil is achieved, the element power output (0–100%) can be adjusted to influence the rate of evaporation and control the final volume for fermentation. Ensure steam can escape as the steam carries away some compounds that would otherwise produce off-flavors in the beer. It is a good idea to closely monitor the start of boil and turn the power down/off if necessary to prevent a boil over (especially important in the first few minutes of the boil until the foam or ‘hot break’ subsides). If using the steam condensor, an anti-foam agent such as the vegetable oil–based Patco 376 or Atmos 300K should be added to prevent foaming. Boiling improves the flavor and kills microbes. Hops can be added into the Hop Basket or Heavy Duty Hop Spider once the foam subsides. Early addition or ‘boil’ hops provide bitterness to balance beer sweetness, and late addition or ‘aroma’ hops provide flavor/aroma. An additive such as Irish Moss (carrageenan) or a commercial flocculant such as Whirlfloc (added for the last 5–10 minutes of the boil) can help remove proteins and yield clearer beer; used alongside proper mashing technique, a highly ‘flocculant’ yeast (one that easily clumps and settles to the bottom of the fermenter where it can be removed) and healthy fermentation will result in clearer beer.
For the last 10 minutes of the boil, the lid (with all valves removed and lid ports left open) can be set in place to let steam sanitize the lid (don’t clamp the lid as steam needs to escape; the pressure relief valve should be tested regularly and always installed on the lid). During this period the element power can be turned down (e.g., 40–70%) on the controller to reduce the risk of boiling over. The process should be monitored during this entire period to ensure boiling over does not occur, as the wort will foam more readily when the lid is in place. If not heat sanitized either with steam or in boiling water, the lid fittings should be sanitized with chemicals.
If completing a 30-45 minute ‘hop stand’ (to add hop aroma and flavor into the beer with minimal bitterness), once the heaters are turned off, the empty jacket should be filled with cold tap water to cool the wort to ~75°C/170°F and the wort given a quick stir with a sterile mixer to equilibriate the temperature throughout the fermenter before adding hops.
6. Cooling: 30–120 minutes (depending on chilling water temperature, fermenter size and flow rate)
Once boiling is complete, a chilling liquid (e.g., cold tap water) is sent through the fermenter jacket. It is important to keep the pressure of the chilling media in the jacket below 5psi (7psi in the 4-in-1) or the vessel could be damaged (keep main vessel body below 3psi in the 3-in-1 and 14.9psi in the 4-in-1). No restrictions should be placed on the outflow of the jacket and the exit/drain hose should be larger than the inlet hose otherwise pressure could build up in the jacket. Care should be taken that no restriction can impede flow and damage the fermenter (e.g., a hose kinking or valve accidentally closing). When using tap water in the jacket for chilling, a water pressure regulator should be installed before the jacket to help ensure pressure does not build up in the jacket. The lid should be installed to keep out airborne contaminants, but a port should be kept open to air during the cooling period, as a vacuum could form as the water cools, damaging the fermenter (or a few psi of CO2 can be added and maintained into the fermenter to counteract any loss of pressure as the wort cools and contracts). A pressure and vacuum relief valve should be installed on the lid to help protect the inside of the vessel (inspect the valve frequently to ensure it is operating correctly). Don’t slow the flow rate of the chilling media too much, as a good flow rate is necessary for faster chilling (the greater the temperature difference between the water leaving the jacket and the wort, the faster the chilling rate). To protect the fermenter, alway use the Water Pressure Regulator when cooling with tap water. If tap water is not at least 10°C/20°F below your yeast pitching temperature, it should be used for the majority of cooling (e.g., down to 30°C/90°F) and for Small/5USG/20L, Medium/10USG/40L, and Large/15USG/60L systems the Brewery Water Chiller can be used for the rest (never use the Chiller for cooling wort that is over 30°C/90°F). For the 1.5BBL-15BBL brewing systems however, due to their much greater volume, one of our 950L/250USG or 2500L/650USG Cold Water/Liquor Tank should be used. For example, if you want to pitch yeast at 20°C/70°F and your tap water is 20°C/70°F (which is too warm to bring the wort down to 20°C/70°F in a reasonable time), first run tap water through the fermenter jacket to bring the wort down from boiling temperatures to around 30°C/90°F and then connect the Cold Water Tank (which was chilled overnight) to your fermenter jacket to bring the wort the rest of the way down to 20°C/70°F. Finally connect the Water Chiller for any final small adjustments and to maintain fermentation temperature. When the wort is ready to have yeast pitched, a sample/gravity reading is taken (to measure the amount of sugar at the start of fermentation). Though not necessary, for the larger systems (e.g., 5 and 7BBL), in addition to using the jacket for chilling, to reduce chill times, some customers will use a separate plate chiller to increase surface area and will run a closed loop of hot wort out from the fermenter, through the plate chiller, and back into the fermenter. (Passing boiling wort through the lines, pump and plate chiller for the last several minutes of boil will sanitize them; for best results, always thoroughly clean the chiller immediately after use.)
7. Filtering and Resting Wort, Pitching Yeast: 10 minutes
When the wort reaches yeast-pitching temperature, the protein that has settled to the bottom is removed out of the bottom port (generally this is 2–5% of the total volume). To facilitate healthy yeast at the start of fermentation, oxygen (or filtered air) is normally added to the wort through the bottom port with the Wort Aeration Stone. The addition of oxygen in the bottom also helps equilibriate the temperature inside, as the rising bubbles stir up the wort. The addition of oxygen can be precisely measured by gas flow meters (and the amount of dissolved oxygen tested by dissolved oxygen meters), but as a general rule, pure oxygen should be added for 1–5 minutes, and air (20% oxygen) for 8–10 minutes (longer for the largest tanks). The temperature is checked again to ensure it is correct for adding yeast, and if no further chilling is necessary, the yeast is pitched, the gas blow-off hose connected to a lid port (with the distil end of the hose in a bucket of water) and the lid sealed. Fermentation should start within 12–36 hours as evidenced by bubbles appearing in the air lock/bucket.
8. Rinsing Out Mash Colander and Pump Assembly: 15 minutes
If not rinsed out during sparge, the Colander, pump and hoses should be thoroughly rinsed out now.
9. Fermentation: 7–14 days
To maintain fermentation temperature, the Temperature Control Valve/Solenoid (TCV) (if using cold tap water) or Water Chiller are used. When programmed to the desired fermentation temperature, the ETC will power the TCV or Water Chiller (or chiller pump depending on one’s preferred setup; see the Chiller setup section of the manual for more details on setup) which will put chilling water into the jacket whenever the fermenter rises above the set temperature. When the fermenter is cooled back down to the set temperature the TCV or Chiller will stop the circulation of cooling water. Technical note: most beer styles are fermented at or below room temperature so only cooling is needed during fermentation, but if needing a warm ferment (e.g., for kettle sours or saisons) the fermenter can be connected to the controller (additional small controllers can be purchased if heating multiple fermenters) for warming. Power output should only be 2–3% so that the heaters do not scorch the yeast. After fermentation has slowed down (4–6 days for ales and 1–2 weeks for lagers), yeast can be removed out of the bottom of the fermenter (first remove the blow-off hose from water or add 1–2psi of CO2 to the top of the fermenter so that water from your blow-off tank is not sucked into the fermenter). This will help ensure yeast cake does not harden and make removal/cleaning difficult.
10. Conditioning and Carbonation : 1–4 weeks
The time it takes for ‘conditioning’ (maturing of the flavor) to occur depends on the style of beer: light, simple ales take 1-2 weeks, lagers or dark, complex beers can take up to 4 weeks or longer. Fermentation mostly completes (that is, it reaches final gravity) normally within a week or two, but it is the final ‘cleanup’ work yeast does that will take beer from tasting ‘good’ to tasting ‘great’. By sampling the beer during fermentation one can learn to tell when it is finished.
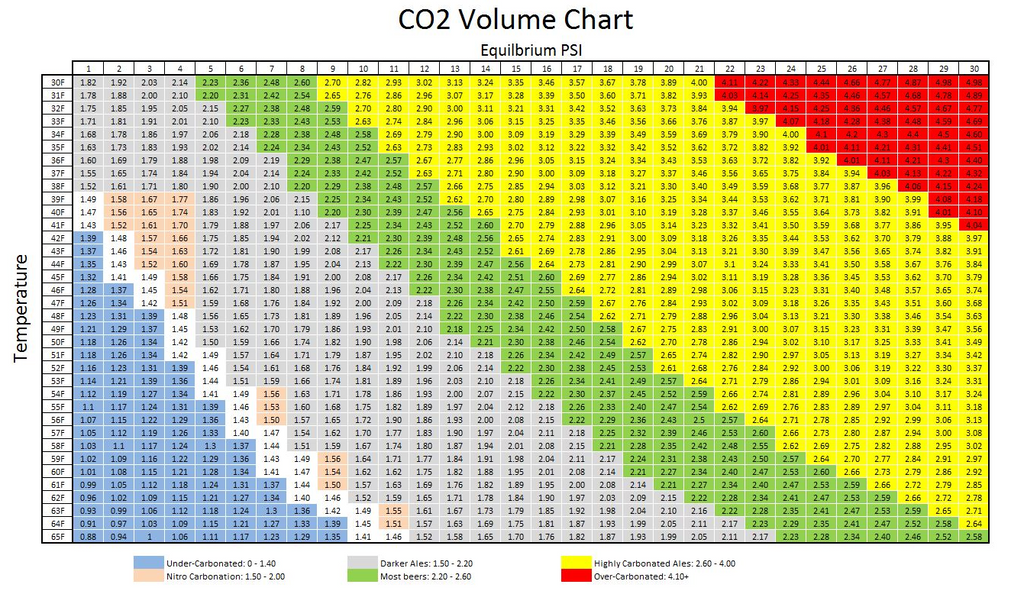
Prior to transfer, to help clear the beer (and make transfer easier if the beer if carbonated), it is often ‘crashed’ to near freezing temperatures for several days. A product like Biofine can also be added at this point to assist with sedimentation. Our removable neoprene insulating jackets can be installed on our regular fermenters to help the Chiller get the beer several degrees colder than would be possible without the jacket. If cold crashing, be sure to add CO2 pressure to offset any vacuum that forms as the beer cools and shrinks. For more information on carbonating in bottles or naturally carbonating in the 4-in-1 fermenter, search for ‘carbonate’ on the BREWHA website. If carbonating in kegs, kegs can be stored in a cold room with 10-14psi of gas pressure depending on the style of beer (carbonation occurs much faster and at lower pressure if the beer is cold)
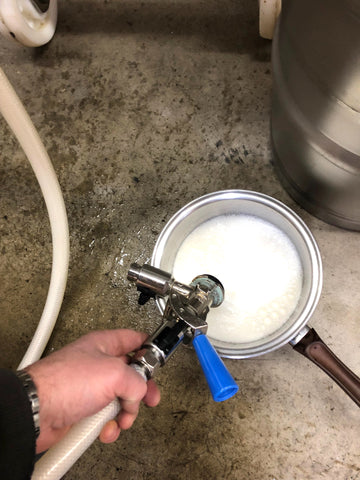
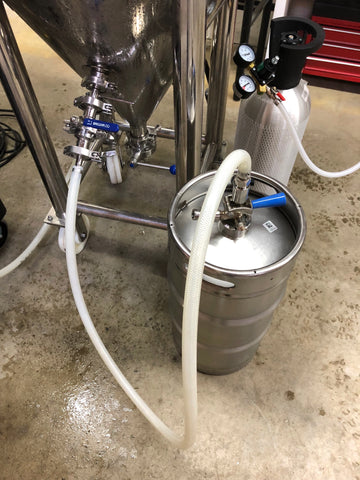
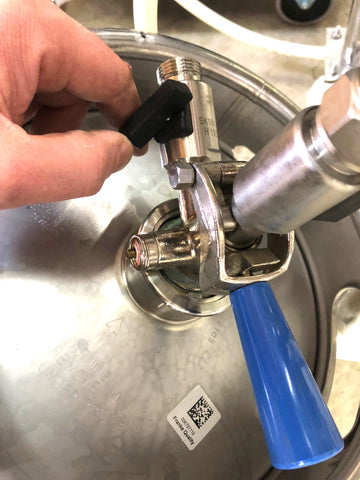
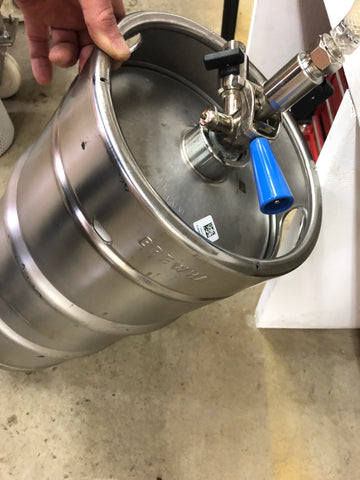
11. Racking/Transferring to Bottles or Kegs: 15–60 minutes
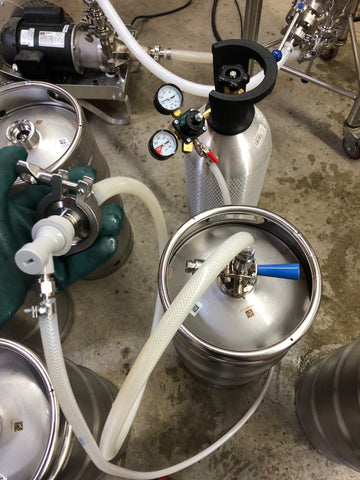
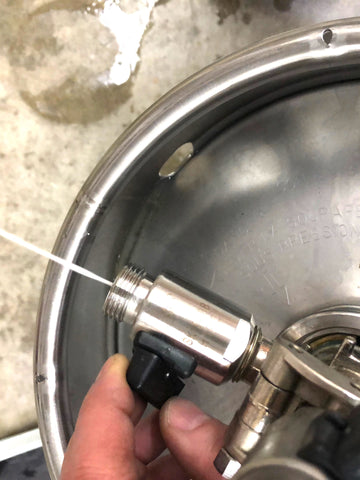
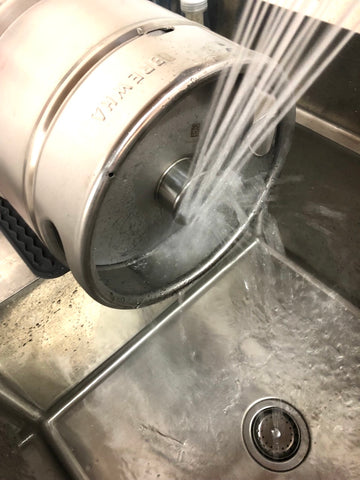
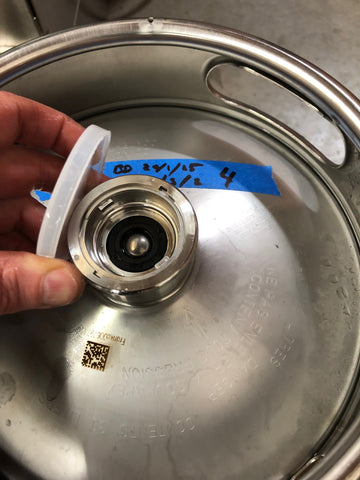
While beer can be served directly from the 4-in-1 fermenters, most customers will transfer to kegs to free up the fermenter for the next batch of beer. For detailed instructions search for ‘clean kegs’ and ‘fill kegs’ on the BREWHA website or watch the video here.
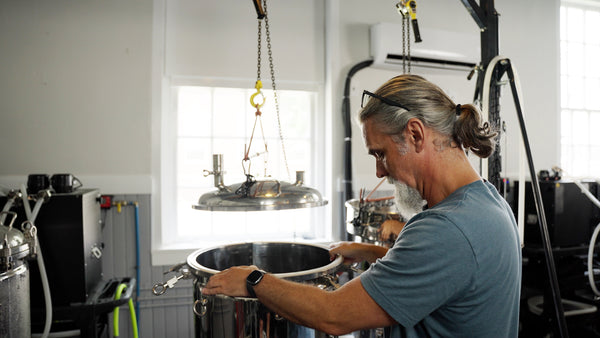
12. Cleaning the Fermenter for the Next Brew: 10-15 minutes
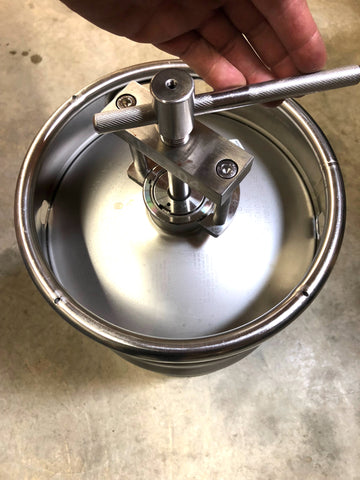
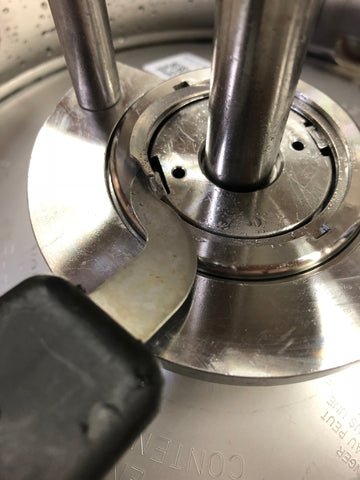
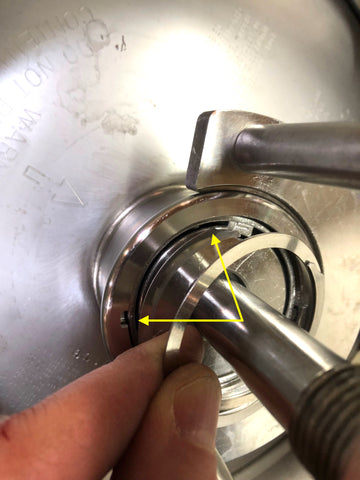
Once the beer is removed, all that is left is cleaning the fermenter out and readying it for the next batch. Any yeast remaining at the bottom can be disposed and the fermenter rinsed out. A stainless safe scrubby such as the Euro Scrubber can be used to clean off the krausen that has dried on the side. The valves should be removed, ball valves disassembled and rinsed out and the ports/ferrules should be cleaned out, the heaters removed and heating rods thoroughly cleaned off. And that’s basically it! The fermenter can be reassembled and readied for the next brew.
]]>


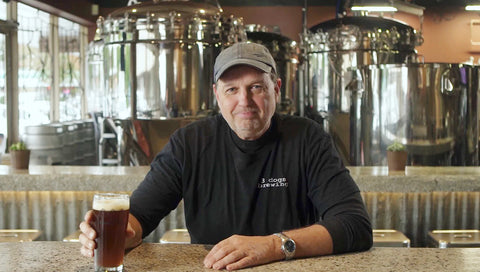
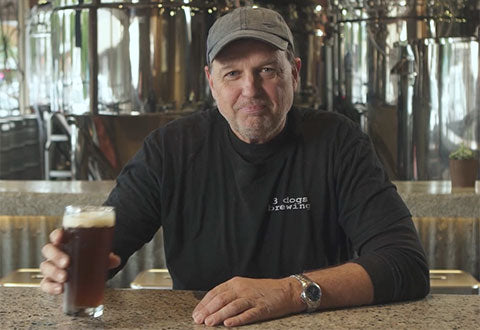
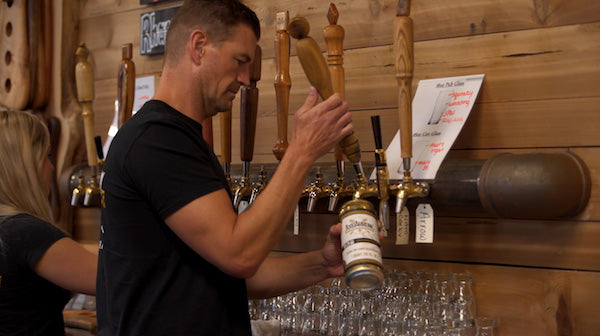
 Compared with the rest of your brewery layout that's all custom, but the BREWHA BIAC system it's easy, it's there, you pick what you want it's already tried and true tested and working it makes it a really easy system to work with, and it's fun! My work day is my hobby; it's like hanging out in the garage all day long brewing beer talking with customers letting them know about our system and how it works.
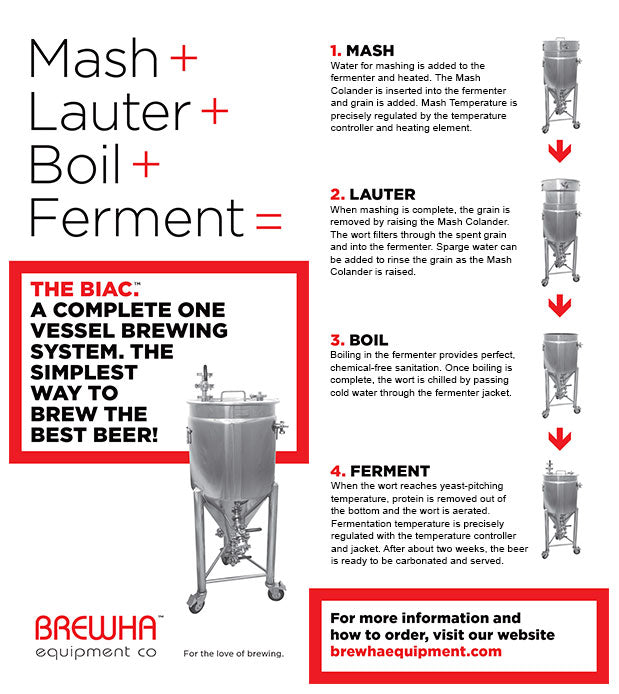


 Like number 2, if you are the only craft brewery in your area, the good beer alone MIGHT be enough. But people want a 'remarkable' experience — which means that they go away and 'remark' to someone else about how great your place is. A key aspect of remarkable is the atmosphere you create, and decoration is in most situations very central to that. Make it a unique and interesting space. If unique and interesting aren't your thing (most people are passionate about something that could be translated into a unique space),
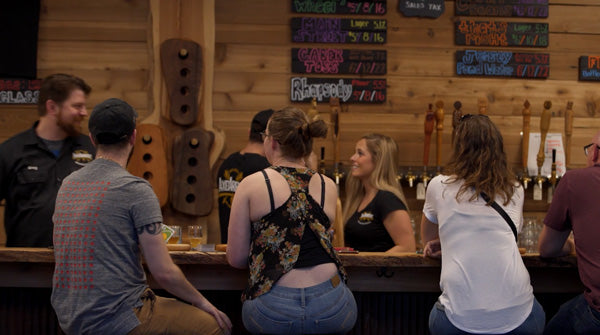

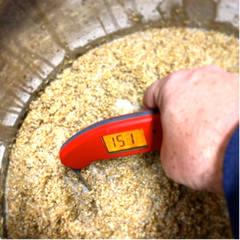 Typically, when we brew to feature hop flavour and aroma, we mash at around 65-66°C (149-151°F) for high fermentability; we choose a neutral yeast that’s quite attenuative; we pitch a big starter; and we ferment on the cool end of the yeast’s range. Our goal is to keep yeast flavours from competing with the hops and to brew a beer that finishes around 1.008 to accentuate the hops through dryness. We’ve found that it’s really easy for stewed malts (crystal/caramel malts) to overwhelm the palate and dominate bright hop flavours.
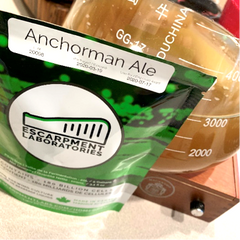
 Again, when it comes to the length of the dry hop, opinions are almost as numerous as brewers. Evidence shows that most aroma compounds are extracted in the first 24 hours, but few brewers opt for a dry hop period that short. We typically allow 3-4 days of contact and have had great success with that. Long dry hop periods can result in unpleasant vegetal and grassy flavours.
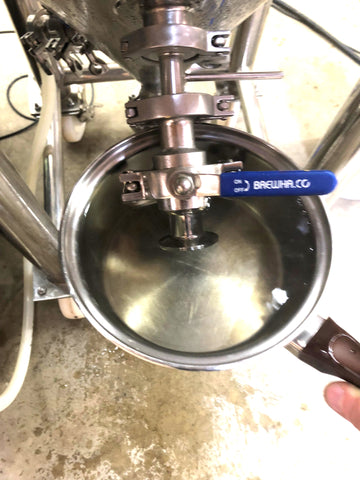
 Step 1:
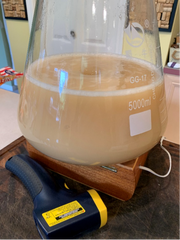
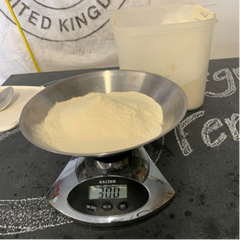
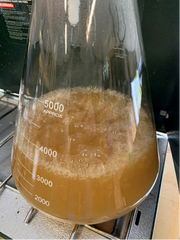
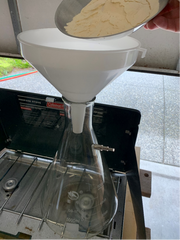 Pour the DME into the Erlenmeyer flask before you fill it with water. Trust us, you’ll want a dry flask and funnel for adding your DME; it’s very sticky, and any moisture around the neck of the flask will cause it to clump. Now fill your flask to the desired level with warm water which will rinse off any DME in the funnel. Cover the flask opening with clean aluminum foil.
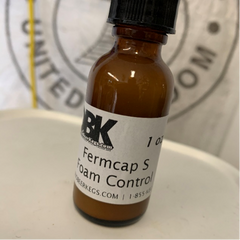 At this point, do yourself a favour and put a drop or two of Fermcap S Foam Control into your wort. This will keep your boiling wort inside the flask instead of all over your stovetop. We don’t have a gas range in the kitchen, so we use a little propane camp stove and it works great. Don’t make the mistake of putting a glass flask directly onto an electric element! If you don’t have an Erlenmeyer flask, you can boil the wort in a pot and then transfer the wort to a cleaned and sanitized gallon jug. If you’re using a glass jug instead of a borosilicate glass flask, be aware that it may not tolerate extreme temperatures.
 It’s important to mark the jars clearly with the strain and date, because you will forget when it was set aside. We leave the lid slightly loose to let gas escape, but BREWHA has a